Introduction:
If you’ve ever craved the rich, aromatic flavors of chicken biryani, you’re not alone! This classic dish, a favorite in many cultures, is a perfect blend of tender chicken, fragrant spices, and fluffy rice. But making it at home? It can feel intimidating—until now! In this guide, we’ll show you exactly how to make chicken biryani like a pro, without the fuss. Whether you’re a first-timer or a seasoned cook, get ready to master this mouth-watering dish with ease!
The recipe below is made at least twice a month in my household and takes me about 30 minutes to assemble! It is a Burmese style chicken biryani and very more-ish. Let’s dive into the secrets tips and tricks for making perfect chicken biryani. Combine this knowledge with the recipe and you’ll be impressing your family and friends with your culinary skills.
Ingredients You’ll Need to Make Chicken Biryani
Chicken biryani is a famous dish found across many cultures but the base ingredients remain consistent across the globe.
- Essential Ingredients: Rice, chicken, onions, and spices.
- Special Ingredients for Flavor: Ginger, garlic, saffron, and yogurt.
- Spices to Elevate the Flavor: Cardamom, cinnamon, cloves, and bay leaves.
The spices and special ingredients vary depending on the culture; making it an eternal delight to try out biryani’s when travelling abroad.
How to Prepare Chicken for Biryani
To prepare chicken for biryani it is essential to marinate with yoghurt and some spices. The yoghurt acts as a tenderiser and ensures the chicken stays juicy throughout the cooking process.
It is best to marinate the chicken overnight for maximum flavour, however, if you are short on time an hour will be sufficient.
How to Cook the Rice for Chicken Biryani
For biryani it is best to use basmati rice. Jasmine or long grain rice will just turn into mush and turn into a biryani disaster. It is important to always wash the starch out of your rice and cook in seasoned (salted) water.
The rice needs to be par boiled i.e. slightly undercooked when strained. The cooking process will continue through the oven baking (dum) phase so make sure you don’t overcook in this phase else you might break the rice on completion which is a big no no.
How to Layer Chicken and Rice for the Perfect Biryani
Layering is the point of difference between biryani and what can turn out looking like fried rice. It is important that there is ample amount of plain white rice between the layer of the onion gravy and special ingredients. It is also important to not press down and compact the rice and spices.
When baking in the oven the onion gravy spices and seasoning pass through the plain rice layers to form the decadent flavour profile. When finished baking it is important to allow the biryani to rest for at least 30 minutes before transferring and serving. Not allowing the biryani to rest may just convert your beautiful biryani with white, coloured, and spiced rice grains with meat and other ingredients into a fried rice equivalent. Beauty doesn’t just happen. Allow it to rest.
Common Mistakes to Avoid When Making Chicken Biryani
- Overcooking the Rice: This will cause rice breakage.
- Tightly packing the biryani layers: Allow the layers to sit naturally, don’t press down on them.
- Skipping the Resting Time: Letting the biryani sit for flavor to meld.
Now that you know exactly how to make chicken biryani, it’s time to get into the kitchen and try it for yourself! With the right ingredients, a bit of patience, and a dash of love, you can recreate this iconic dish at home. Whether you’re making it for a special occasion or just a cozy family dinner, chicken biryani is sure to impress. Don’t forget to experiment with your own twist on the recipe—who knows, you might just make your own signature biryani! Happy cooking!
How to Make Chicken Biryani: A Step-by-Step Guide for Perfectly Spiced Rice and Chicken
Ingredients
Chicken Marinade
Biryani
Instructions
-
Place all the chicken marinade ingredients into a bowl and mix. Allow to sit in fridge for at least 1 hour. For best results allow it to sit overnight.

-
Wash the rice and parboil in salt seasoned water.
-
While the rice is cooking in a separate pan place the oil medium heat. When hot add the chicken thighs and partially cook until the marinade forms a golden crust on the chicken. Don't cook until completion as the chicken will continue to cook through when cooking the biryani.
-
While the chicken and rice is cooking roughly chop the onions, place in a blender and blend to form onion paste.
-
Remove the chicken from the pan. There should still be oil. Increase to high heat and when hot add the blended onions. It is important that when the blended onions hit the pot there is a rapid sizzling sound. (See note 1)
-
The onion paste needs to keep frying on high heat until the oil and gravy move as one and the raw onion smell is gone. (See note 2)
When the raw smell is gone reduce to medium heat, add the spices and salt and allow to fry to release the aromas then add raising and cashews.
-
At this stage the rice should be par boiled. Strain the rice and rinse through with cold water to slow down the cooking process.
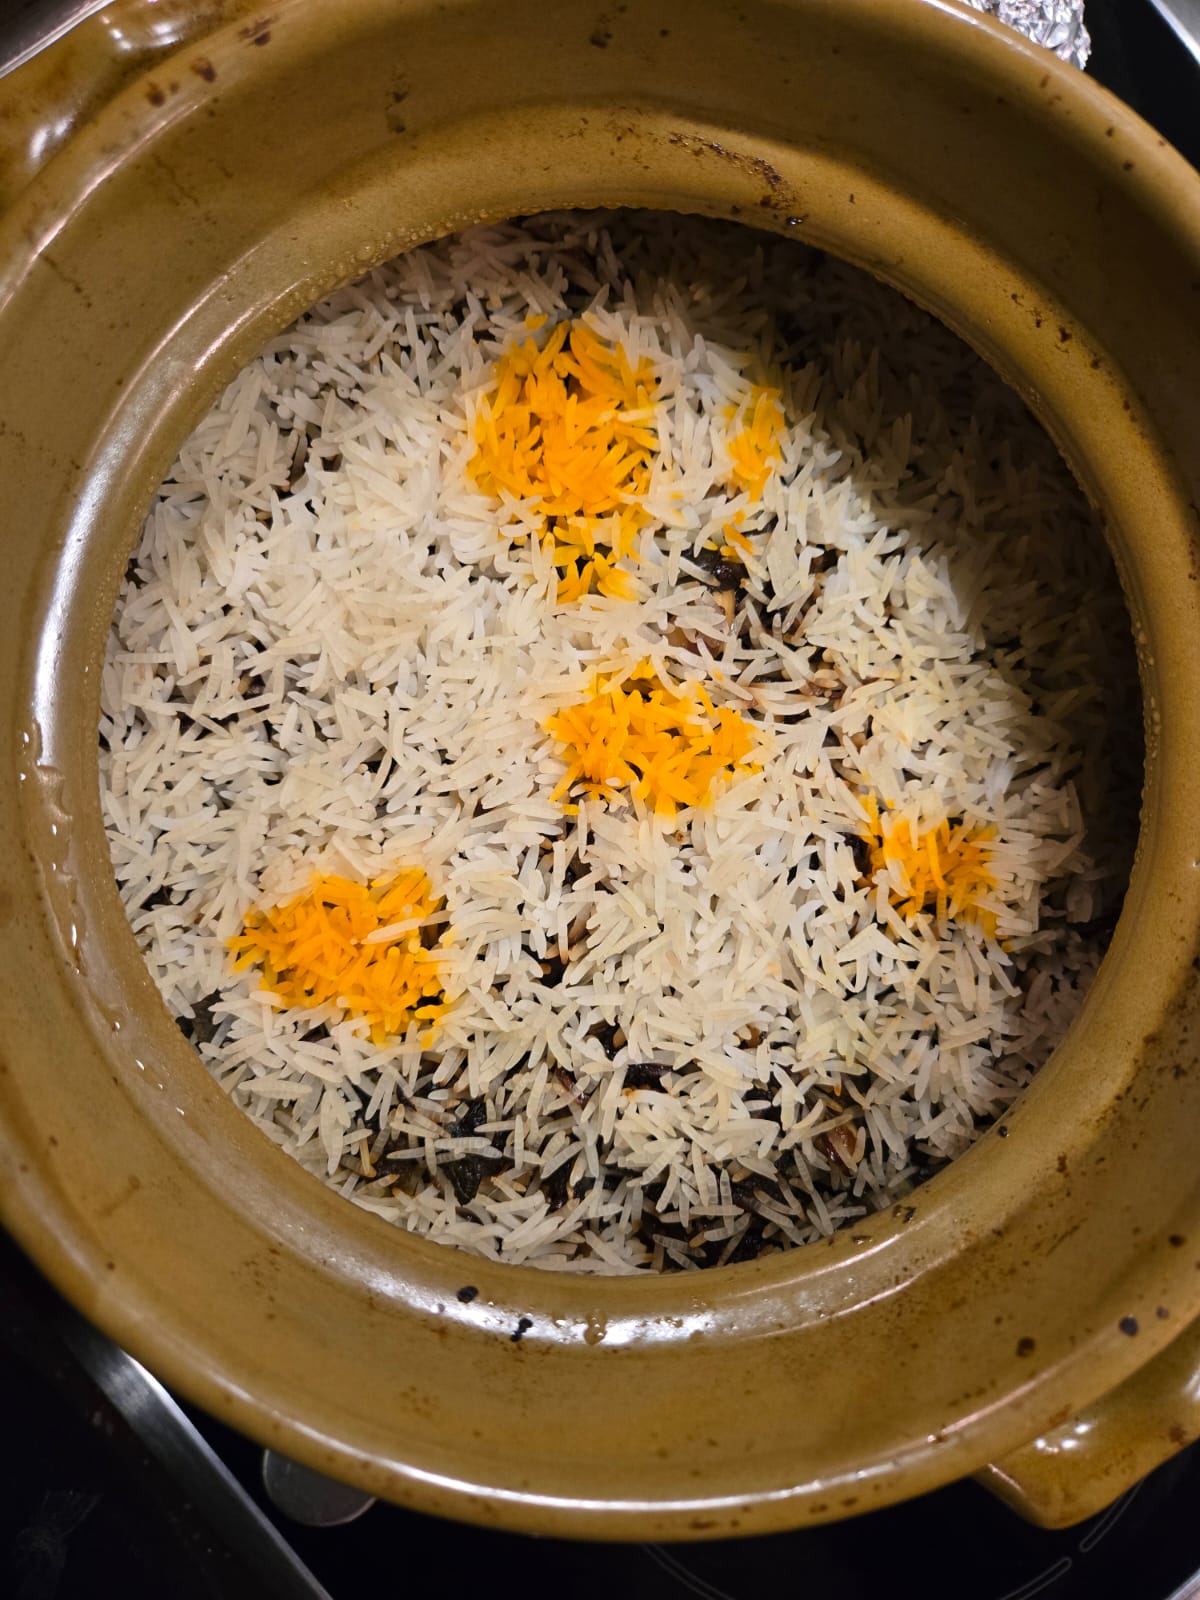
Layering the biryani
-
Aim to use a pot size that will allow you to layer rice and biryani paste about 2 times.
To layer the biryani place all the chicken thighs at the bottom of the pot. Then place in layer in the following order:
- plain parboiled rice
- biryani onion paste (containing raisins and cashews)
- Mint
- Fried shallots
The final layer should finish with plain rice.
For presentation prepare the imitation saffron by mixing in a bit of water and drizzling on the top.
-
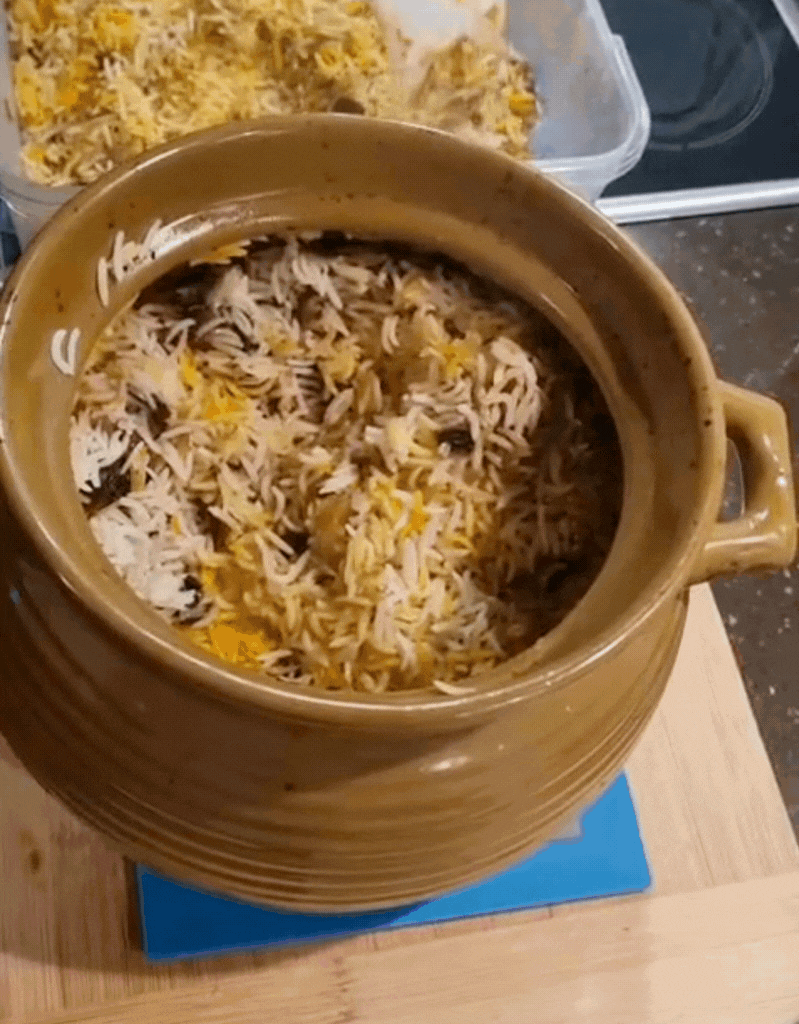
Securely close the lid of the clay pot and place in oven set to 150C for 60 mins.
-
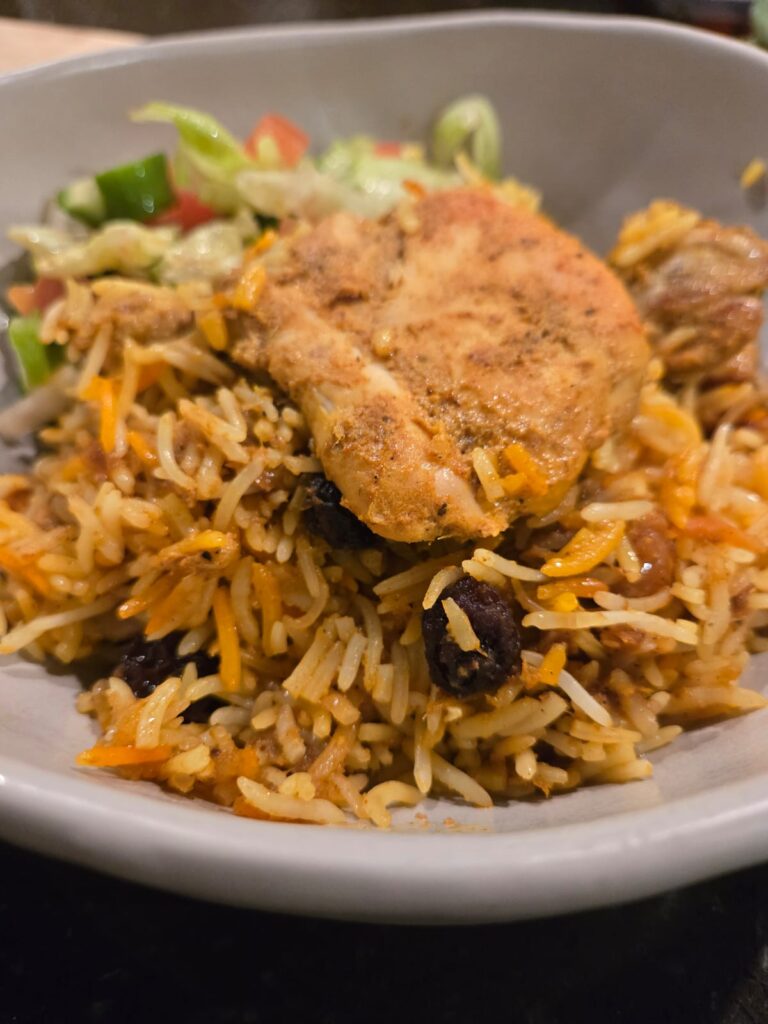
Remove from oven and allow to rest for at least 30 minutes. Note that the oil will settle to the bottom of the pot. It is best to transfer the biryani rice and lightly mix the layers after resting, this way you can serve the rice and get to the tender chicken on the bottom of the pot easily.
-
This dish is traditionally served with pepper water, belachan and pickle salad but, if you want something quick to balance it with some freshness, a quick lettuce tomato and cucumber salad with balsamic dressing will suffice.
Note
Note 1: The onion paste needs to literally fry, like shallow fry in the oil. A failure to ensure high heat when the onion hits the pan means that the onion gravy will struggle to become sweet and caramelized.
Note 2: The onion paste needs to be suspended and somewhat swimming in the oil. If the ratio of oil to onion is a bit off feel free to add in more oil to the pot to encourage full caramelization.
So delicious though I left out the raisins. Thank you!
You’re very welcome <3